Spring Boot Auditing: Automatically Track CreatedBy, CreatedAt, UpdatedBy and UpdatedAt

Auditing allows you to automatically track who created or last modified an entity and when it happened. Auditing plays a critical role in any serious application—from internal business systems to public-facing platforms.
Why JPA Auditing is Important:
Implementing auditing in your Spring Boot application has several real-world benefits:
In a typical Spring Boot application, auditing tracks:
createdBy: Who created the data
createdAt: When the data was created
updatedBy: Who last modified it
updatedAt: When it was last modified
These are commonly applied to database entities. In Spring Boot, this is achieved using JPA Auditing, which leverages annotations and lifecycle listeners to populate these fields automatically.
How to Implement JPA Auditing Feature in Spring Boot – Step-by-Step Guide with Examples:
Learn how to automatically track who created or updated a record in your Spring Boot application using JPA Auditing. This step-by-step tutorial shows how to use annotations like @CreatedBy, @CreatedDate, and more — without writing extra boilerplate code.
Step 1: Add Dependencies
If you're using Spring Data JPA (which most Spring Boot applications do), the auditing capability is built-in. Make sure you have the following dependency in your pom.xml:

This starter brings in JPA and Hibernate support which is essential for auditing
Step 2: Enable Auditing Configuration
Now enable auditing using @EnableJpaAuditing in your configuration class:
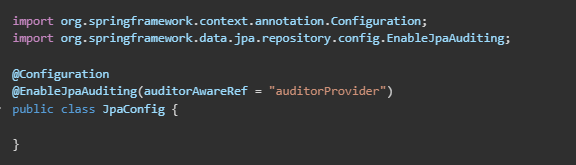
auditorAwareRef = "auditorProvider" refers to the bean name of AuditorAwareImpl.
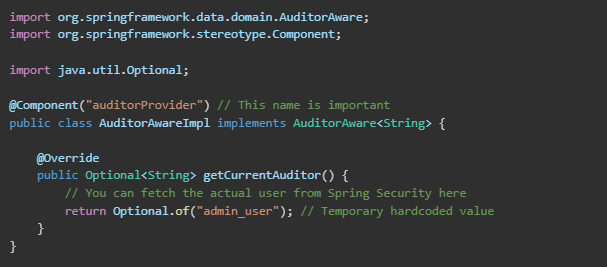
Step 3: Create AuditorAware Implementation
Spring needs a way to determine who the current user is. Create a class that implements AuditorAware<String>.
Integrate with Spring Security (Later)
To return the authenticated user:

Step 4: Annotate Your Entity
Use the following annotations in your entities:
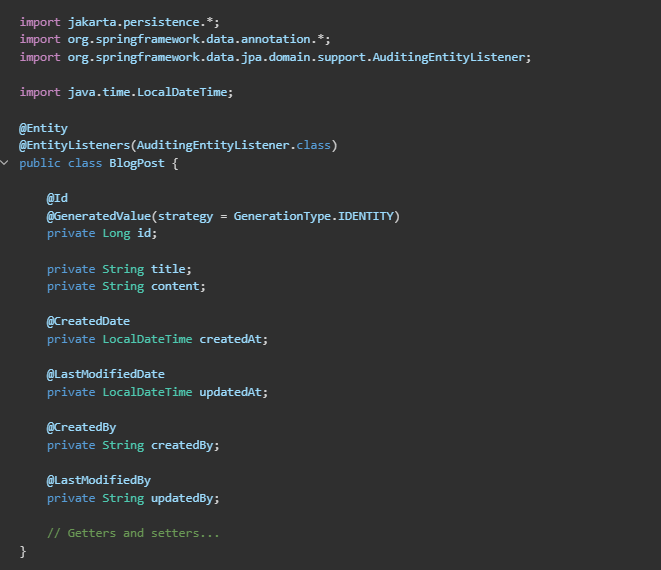
Make sure createdAt and updatedAt are of type java.time.LocalDateTime (or Instant), and you have enabled auditing entity listeners.
Done! Test It
Now whenever you save or update an entity, createdAt, updatedAt, createdBy, and updatedBy will be automatically populated.
You can verify this in your database after a POST or PUT operation.
Example Output (Database)

JPA Auditing in Spring Boot is a powerful tool that:
- Minimizes boilerplate code
- Increases data integrity and traceability
- Enhances user accountability
- Makes your app audit-ready for compliance